Timing Belt Replacement for Hyundai Elantra: What’s Involved
Knowing when to replace the timing belt on your Hyundai Elantra is crucial for maintaining your vehicle’s performance and preventing potential engine damage.
Significance of Timing Belt in Engine Performance
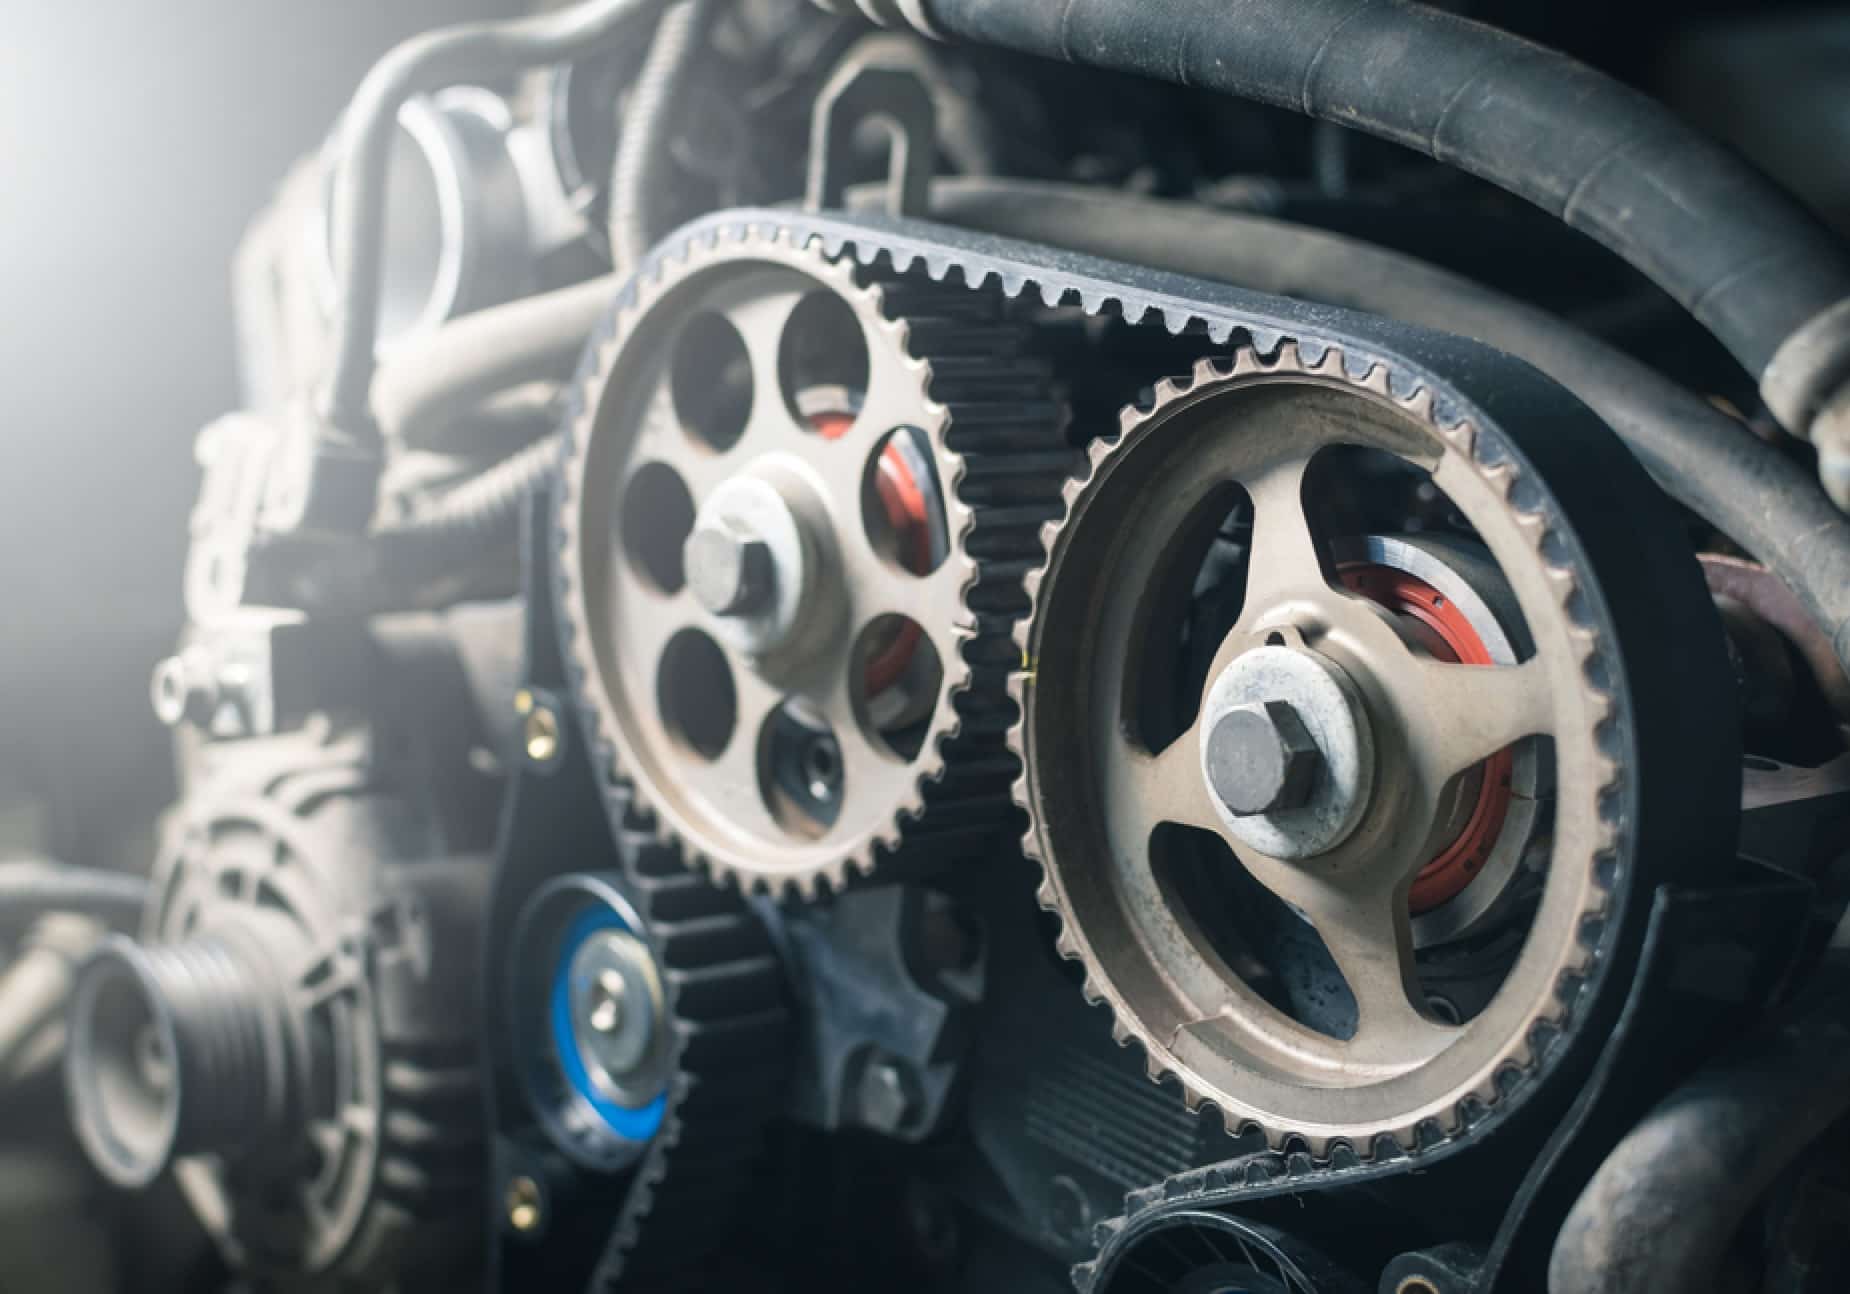
The timing belt is a significant component in your Hyundai Elantra’s engine. It synchronizes the crankshaft and camshaft rotations, ensuring that your engine’s valves open and close at the correct times. This precise timing is vital for the engine’s ability to function efficiently and to avoid potential damage to the engine’s interior components.


Indicators of Timing Belt Wear and Tear
You should be alert to signs of wear and tear in your timing belt, as early detection can prevent costly repairs. Symptoms that indicate it may be time for a replacement include:
- Unusual Noises: A ticking sound coming from the engine could suggest a loosened timing belt.
- Engine Misfires: A worn-out timing belt can cause the engine to misfire, affecting your Elantra’s performance.
- Rough Idling or Difficulty Starting: These issues may arise from a timing belt that has lost its structural integrity.
- Visual Inspection: Cracks, abrasions, or pilling on the belt are physical signs that the timing belt needs attention.
Regular maintenance, guided by your Hyundai Elantra’s service manual and an experienced mechanic, will help you keep on top of timing belt health and avoid unexpected engine issues.
Cost Factors for Timing Belt Replacement

The cost of replacing the timing belt on your Hyundai Elantra can vary due to different factors, from the specifics of your vehicle to the nature of the repairs.
Parts and Labor Breakdown
The cost of parts for a timing belt replacement generally includes the belt itself and may also involve tensioners and pulleys. These parts are critical for the proper function of your car’s engine and should be replaced together:
- Timing Belt: $30 – $50
- Tensioner Pulley: $40 – $70
- Idler Pulley: $25 – $45
Labor costs can vary widely, typically ranging $200 to $300. Mechanics will charge based on the time they expect the job to take, usually between 3-6 hours. Rates can vary based on shop location and whether you’re visiting a dealership or an independent mechanic.
Variation by Model Year and Engine Type
Your Hyundai Elantra’s model year and engine type can affect the cost of timing belt replacement. Here’s a brief guide to understanding how these factors can impact your cost:
- 2001-2006 Elantra (2.0L Engine): Typically incurs lower labor costs due to simpler engine design.
- 2007-2010 Elantra (2.0L Engine): May require more labor due to engine compartment layout.
- 2011-2016 Elantra (1.8L and 2.0L Engines): Newer models might need more advanced parts that are costlier.
Additionally, if your model has an interference engine, it’s crucial to replace the timing belt regularly to prevent extensive damage.
Potential Additional Repairs and Costs
When replacing your timing belt, your mechanic could discover additional issues that need addressing:
- Water Pump: If it’s driven by the timing belt, replacement is often recommended.
- Oil Seals: In case of leaks, these should be replaced to avoid future damage.
These repairs will incur additional parts and labor costs:
- Water Pump Replacement: Typically adds $150 – $300 to your repair bill.
- Oil Seal Replacement: Adds approximately $20 – $50 per seal.
Unexpected issues like corroded bolts or accessory belt replacement could also add to your total cost.
Process of Timing Belt Replacement
Replacing the timing belt on your Hyundai Elantra is a critical maintenance task that can prevent costly engine damage. Following a systematic process ensures a secure and efficient replacement.
Preparation and Safety Measures
Before you begin, gather all necessary tools and parts for the timing belt replacement. You will need a new timing belt, tensioner, pulleys, and possibly new seals and a water pump.
- Tools Required:
- Socket set
- Torque wrench
- Screwdrivers
- Camshaft locking tool
- Jack and jack stands
Your safety is paramount, so make sure to:
- Park your vehicle on a level surface and engage the parking brake.
- Disconnect the battery by removing the negative terminal to prevent accidental engine start.
- Raise the vehicle using a jack and securely support it on jack stands.
Step-by-Step Replacement Procedure
Replacement of the timing belt involves several detailed steps. Adhere closely to the following procedure to ensure the job is done correctly.
Removal:
- Remove any components obstructing access to the timing belt cover, such as the engine mount or the serpentine belt.
- Unbolt and take off the timing belt cover to reveal the timing belt and pulleys.
- Rotate the crankshaft to align timing marks on the crankshaft and camshaft sprockets for proper timing during installation.
- Loosen the tensioner to release tension from the timing belt, then detach the belt.
Installation:
- Compare the new timing belt with the old one, ensuring it’s the correct type and size.
- Set up any new tensioners, pulleys, and the water pump if applicable.
- Install the new timing belt starting from the crankshaft, moving to camshaft and other pulleys, making sure to maintain proper tension.
- Tension the belt following the manufacturer’s specified method, usually involving a tension gauge.
Post-Replacement Checklist
After installing a new timing belt, verify the following before reassembling the engine components and starting the vehicle:
- Timing Marks: Confirm that the timing marks on the crankshaft and camshaft sprockets still align perfectly.
- Pulley and Tensioner Movement: Check for smooth pulley operation and ensure the tensioner provides the correct tension.
- Belt Deflection: Press lightly on the timing belt at its longest span to verify there is a slight give, indicative of proper tension.
Upon completion of these checks, you can reassemble any removed parts and reconnect the battery. It is highly recommended to manually rotate the engine several times using the crankshaft bolt to ensure that the engine is turning freely and that the timing marks remain aligned. This final step helps to ensure that the timing is set correctly and no components are interfering internally.