Ah, the dreaded brake caliper compression – the bane of many a DIY mechanic’s existence. But fear not, fellow gearheads! With a bit of know-how and elbow grease, you’ll be compressing those calipers like a pro in no time.
To compress a brake caliper, you’ll need to push the piston back into its housing using a specialized tool or a creative workaround. A C-Clamp and the old brake pad can get the job done.
This process is essential when replacing brake pads or servicing your brake system.
It might seem daunting at first, but with the right technique, you’ll have those calipers purring like a well-oiled machine.
Ready to get your hands dirty? Let’s dive into the nitty-gritty of caliper compression and turn you into a brake master. Trust me, your wallet (and your car) will thank you for taking on this task yourself.
Key Takeaways
- Compressing brake calipers is crucial for brake pad replacement and maintenance
- Various tools and techniques can be used to compress calipers effectively
- Proper preparation and post-compression steps ensure optimal brake performance
Understanding Brake Calipers
Brake calipers are the unsung heroes of your car’s braking system. These mighty metal clamps play a crucial role in slowing down your vehicle, so let’s get to know them better.
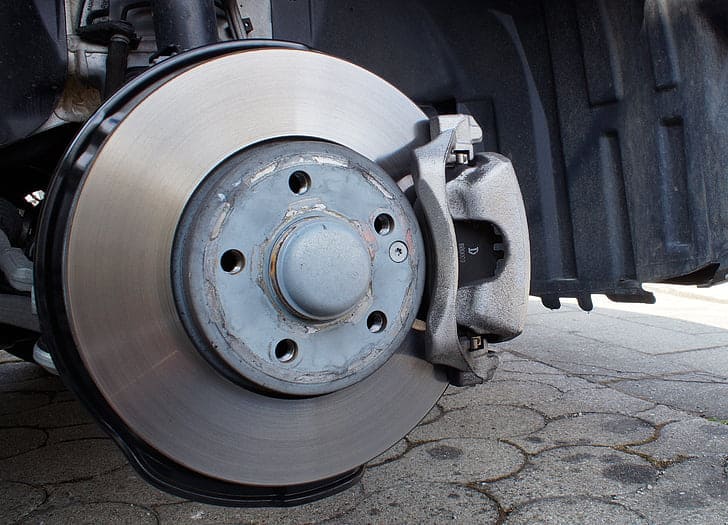
Components of a Caliper
The caliper is like a mechanical sandwich, with your brake rotor as the filling. On one side, you’ve got the caliper housing. This tough cookie holds everything together and mounts to your vehicle.
Inside, you’ll find the star of the show: the brake caliper piston. This little powerhouse pushes the brake pads against the rotor when you hit the brakes. It’s like a tiny hydraulic muscle!
Brake pads are the caliper’s teeth. They grip the rotor to slow you down. Don’t forget the rubber seals and boots – they keep dirt and moisture out of your caliper’s business.
Types of Brake Calipers
Just like cars, calipers come in different flavors. The most common type is the floating caliper. It’s like a seesaw, moving back and forth to apply even pressure.
Fixed calipers are the bodybuilders of the bunch. They don’t move, but they pack multiple pistons for serious stopping power. You’ll often find these on performance vehicles.
For the budget-conscious, there are sliding calipers. They’re simpler and cheaper to produce, but still get the job done. Some cars even use electromechanical calipers – the high-tech cousins of the bunch.
Tools Required for Compression
Compressing brake calipers doesn’t have to be a pain in the rear end. With the right tools, you’ll be back on the road faster than you can say “squeaky brakes.”
Choosing the Right Tools
The star of the show is the trusty c-clamp. This little beauty is like the Swiss Army knife of caliper compression. Just slap it on, give it a twist, and watch that piston retreat like it’s seen a ghost.
For those fancy rear calipers that need a bit more convincing, you might want to invest in a caliper piston tool. It’s like a c-clamp’s sophisticated cousin – all dressed up and ready to party with those stubborn pistons.
Don’t forget your trusty screwdriver. It’s not just for opening paint cans anymore! You’ll need it to pry off those old brake pads. And hey, while you’re at it, grab a pair of channel locks. They’re great for when things get a bit slippery.
Alternative Tools
No c-clamp? No problem! You can compress your caliper with a good old-fashioned piece of wood and some elbow grease. Just wedge it in there and push like you’re trying to close an overstuffed suitcase.
If you’re feeling fancy, you could spring for a piston compression tool. It’s like the Ferrari of caliper tools – sleek, efficient, and makes you look like you know what you’re doing.
For the MacGyvers out there, a pair of pliers and some creativity can work wonders. Just be gentle – you’re compressing a piston, not wringing out a wet towel.
Remember, the right tool can make the job a breeze. But in a pinch, a little ingenuity goes a long way. Just don’t use your favorite coffee mug as a hammer. Trust me on this one.
Preparing to Compress the Caliper
Before you dive in, make sure you’ve got your ducks in a row. A little prep goes a long way in making this job a breeze.
Safety First
Alright, bucko, let’s talk safety. You wouldn’t go skydiving without a parachute, so don’t mess with your brakes without the right gear.
Grab some safety glasses – trust me, brake dust in your peepers is no fun.
Next, slip on some gloves. Brake fluid’s about as friendly to your skin as a cat in a bathtub.
Speaking of brake fluid, keep an eye on that reservoir. If it’s looking low, top it off before you start. Nobody likes a brake system failure, especially when you’re cruising down the highway.
Last but not least, make sure your car’s on a flat surface and the parking brake is engaged. You don’t want your ride doing the cha-cha while you’re working.
Accessing the Caliper
Time to get up close and personal with your caliper.
First things first, loosen those lug nuts before you jack up the car. It’s way easier than trying to do it mid-air.
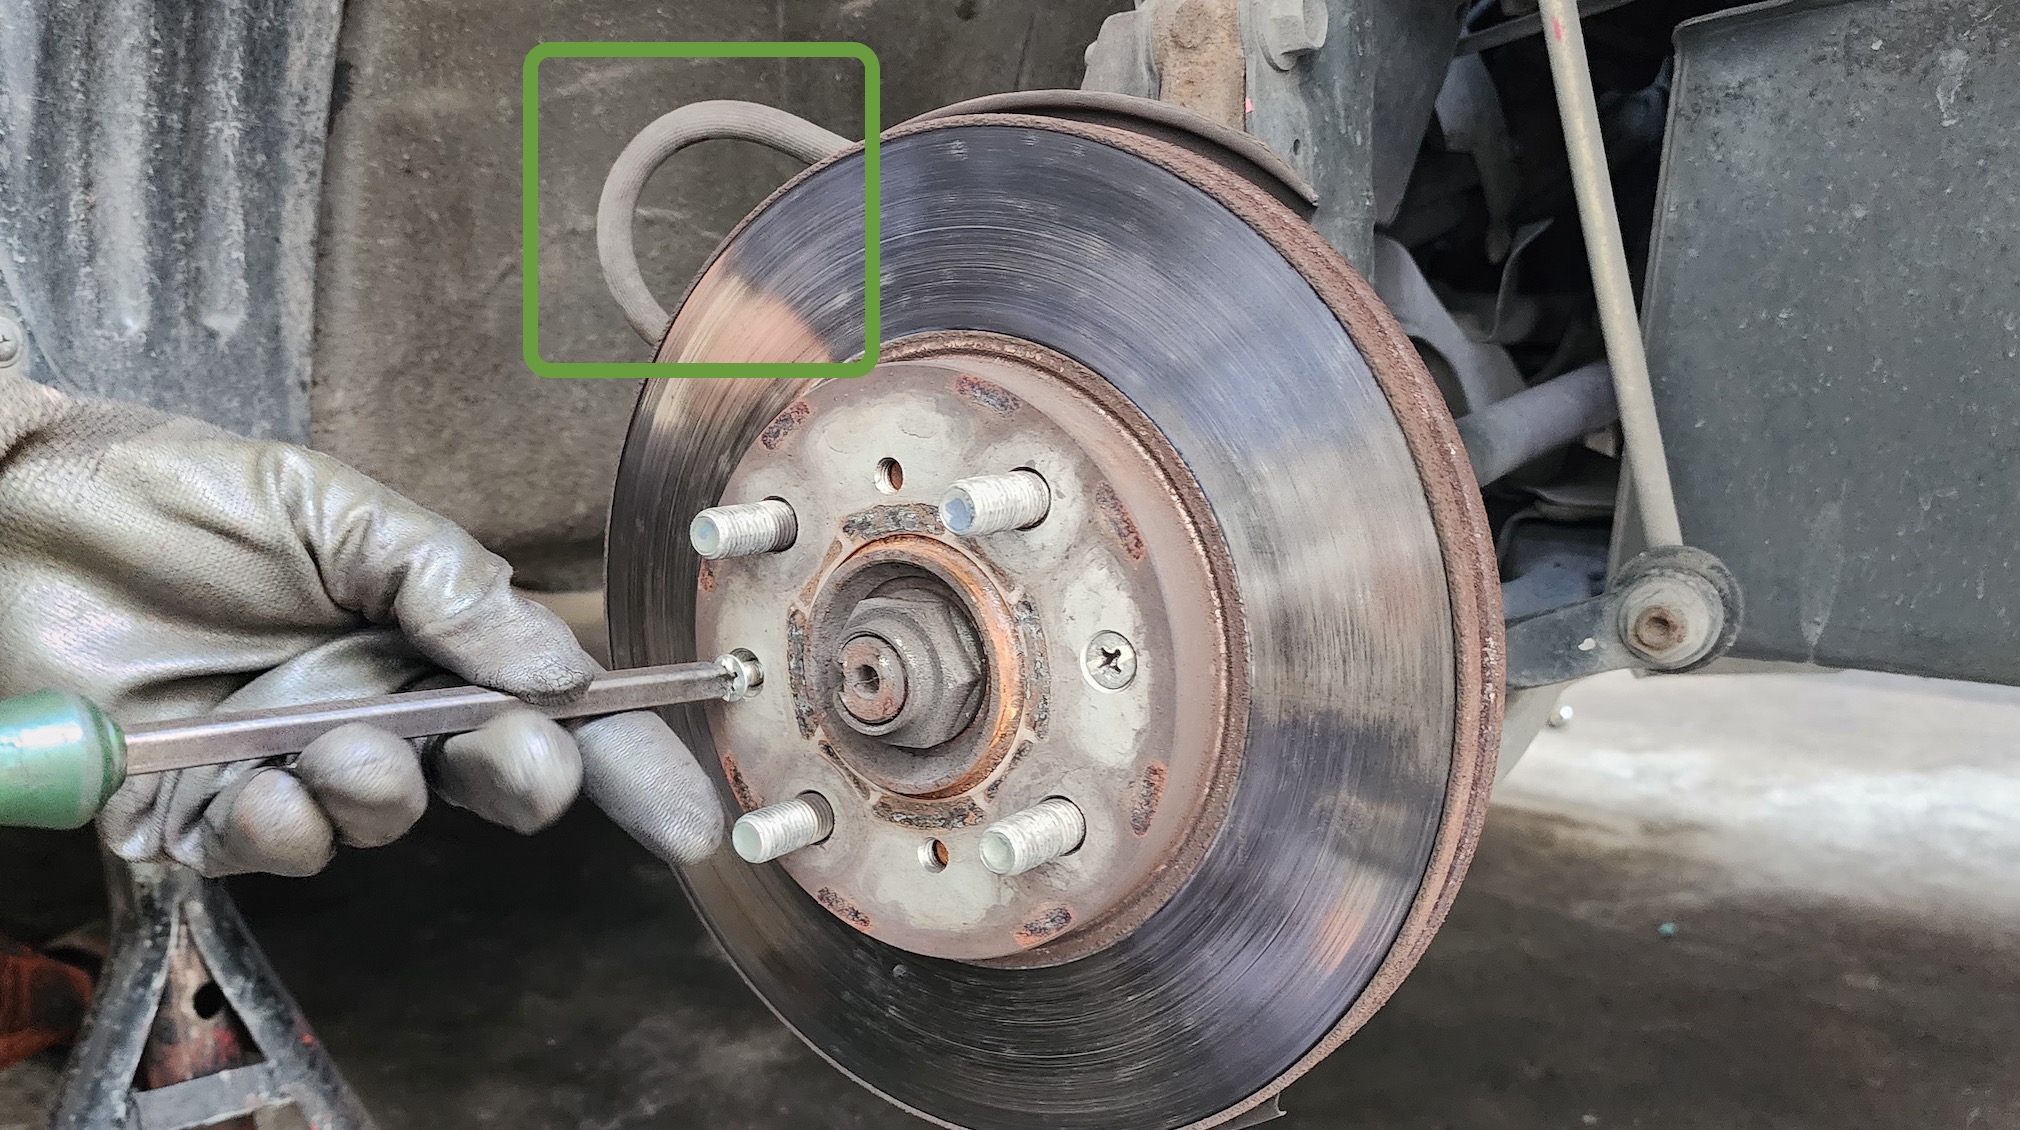
Once your car’s up and the wheel’s off, take a good look at that caliper. It might be hiding behind brake dust, so give it a quick clean if needed. You’ll want to see what you’re doing, after all.
Now, locate the brake pads. They’re the unsung heroes of your brake system, sandwiched between the caliper and rotor. You’ll need to remove these bad boys to get to the caliper piston. Don’t worry, it’s easier than getting ketchup out of a bottle.
Compressing the Caliper Pistons
Compressing brake caliper pistons is a crucial step in replacing brake pads. It’s not rocket science, but it does require some elbow grease and know-how. Let’s dive into the nitty-gritty of squeezing those stubborn pistons back into place.
Step-by-Step Compression
First things first, you’ll need to open the brake fluid reservoir. This prevents pressure buildup as you compress the pistons.
Now, grab your C-clamp or piston compression tool. If you’re feeling crafty, a pair of channel locks can do the trick too.
Position your tool of choice against the back of the caliper and the old brake pad. Start tightening slowly. You’ll feel some resistance – that’s normal. Keep going until the piston is fully retracted.
For rear calipers, you might need to twist as you compress. Some vehicles require a special tool for this job. Don’t force it if it’s not budging!
Troubleshooting Compression Issues
Sometimes, those pesky pistons just won’t play ball.
If you’re struggling, check if the brake hose is kinked or if there’s air in the system. These can make compression a real pain in the tailpipe.
If your caliper piston won’t compress, it might be stuck or corroded. A little penetrating oil can work wonders here. Apply it around the piston and let it sit for a few minutes before trying again.
Still no luck? Your caliper might be toast. Time to consider a replacement.
Post-Compression Steps
After compressing the brake caliper, there are crucial steps to ensure your brakes work safely and efficiently. Let’s walk through putting everything back together and making sure your brakes are road-ready.
Reassembling the Brake Components
Time to get your hands dirty again!
Start by sliding your new brake pads into place. They should fit snugly, but don’t force them. If they’re fighting you, double-check you’ve got the right pads.
Next up, reattach the caliper. This can be a bit like wrestling an octopus, but patience is key. Make sure you line up the caliper correctly over the rotor and pads.
Now, grab those caliper bolts. They’re not just for show – tighten them to the manufacturer’s specifications. Too loose, and you’ll have a wobbly caliper. Too tight, and you might crack something.
Don’t forget the brake grease! A little dab on the back of the pads and on the caliper slides will keep things moving smoothly and quietly.
Testing the Brake System
Alright, you’ve got everything back together. Time to make sure it actually works!
Start by checking the brake fluid level. If it’s low, top it off, but be careful not to overfill.
Now, hop in the driver’s seat and give that brake pedal a firm press. It might feel a bit spongy at first, but after a few pumps, it should firm up. If it doesn’t, you might have air in the lines.
Take the car for a slow spin around the block. Listen for any unusual noises and feel for any vibrations. The brakes should engage smoothly without pulling to one side.
Frequently Asked Questions
Compressing brake calipers can be tricky, but fear not! There are clever ways to tackle this task, even without specialized tools. Let’s dive into some common questions and uncover the secrets of caliper compression.
What’s the trick to compress a brake caliper if your toolbox lacks a C-clamp?
No C-clamp? No problem! You can use a screwdriver to compress your brake caliper. Simply place the tip of a flathead screwdriver against the piston and lever it back. Be gentle, though – you’re not trying to win an arm-wrestling match with your brakes.
Is there a way to get that stubborn brake caliper piston to budge without professional tools?
You bet! Channel your inner MacGyver and grab that old pair of pliers. Place the handles of the pliers against the piston and squeeze. It’s like giving your caliper a bear hug, but with more grease and less fur.
Can you guide me through the process of compressing a brake caliper without the ritual of bleeding?
Sure thing! First, crack open the bleeder valve to relieve pressure. Then, use a piston tool or large C-clamp to slowly push the piston back. Close the valve once you’re done. No blood sacrifice required!
Tell me, what’s the secret sauce for using a C-clamp to compress a brake caliper without turning the garage into a crime scene?
The key is patience, my friend.
Place an old brake pad against the piston for even pressure.
Slowly tighten the C-clamp, giving the brake fluid time to backflow. If you see fluid overflow, take a breather.
Rome wasn’t built in a day, and neither should your brakes be compressed.
I’ve been wrestling with the rear brake caliper piston and it’s winning; any tips to subdue this beast?
Ah, the ol’ rear caliper tango!
These tricky devils often need to be rotated as they’re compressed.
Use a brake caliper tool that fits into the piston’s notches.
Turn it clockwise while applying pressure. It’s like opening a really stubborn jar, but with more satisfaction when you succeed.
They say you need a special tool to compress a brake caliper, but can a clever mind outwit this mechanical conundrum?
Absolutely!
While special tools make life easier, they’re not always necessary.
You can use a piece of wood and a large adjustable wrench as a makeshift compression tool.
Just be careful not to invite splinters to the party.
Remember, necessity is the mother of invention… and possibly some interesting brake repairs.